DISCLAIMER: THIS PAGE MAY CONTAIN AFFILIATE LINKS.
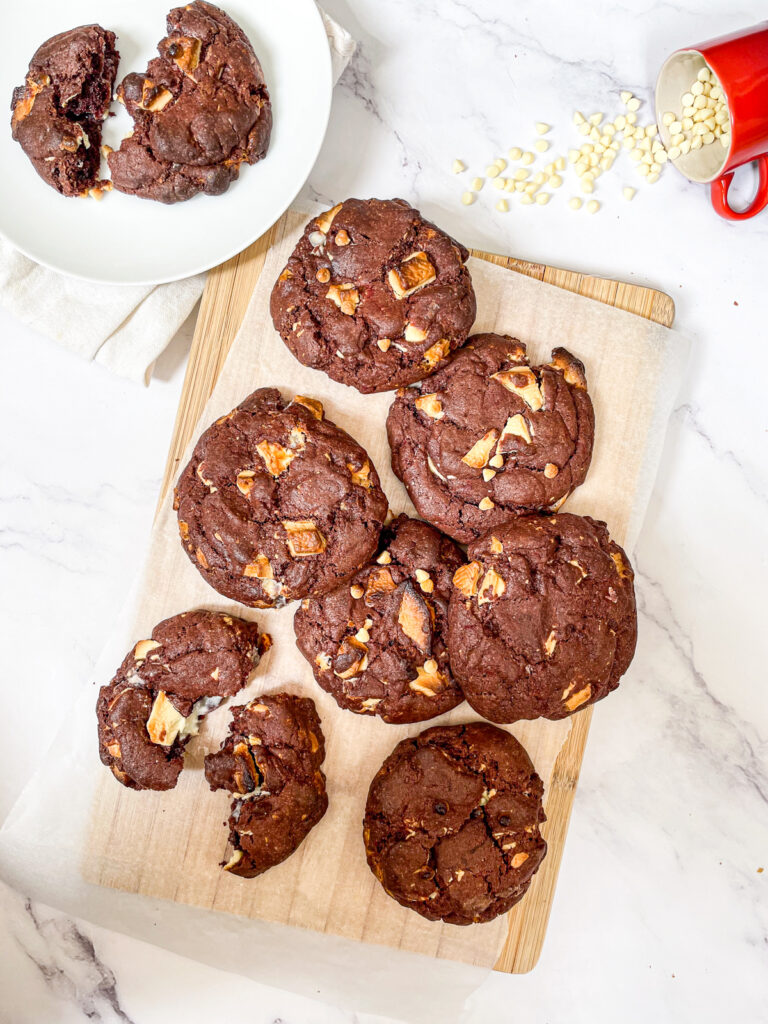
Jump to RecipeThese Milk Chocolate Chunk and Walnut Cookies are a fabulously nostalgic bake. A super easy cookie recipe gets filled with lots of chocolate and walnuts for a texture contrast of dreams. The cookies end up with a slightly crisp edge and soft centre, the pinnacle of a good cookie for me.
This is such an easy cookie recipe, and I love how fun it is to pull together. The final product is a crisp outside, soft centre cookie, packed with chunks of chocolate and walnut. The amount of vanilla extract may look like a lot when measuring but this adds that real nostalgic cookie taste! I find milk chocolate and walnut pair together so wonderfully, but there is obviously space to make these suit what you have to hand!
As is common on my site, this is a mega versatile recipe. You could absolutely sub the chocolate and nuts for alternatives but I feel this is the best combination. I prefer milk chocolate chunks but chips work well too! Similarly, feel free to change how big they are to make more or fewer. If you do this, however, make sure to adjust the bake time up or down accordingly. This is a great cookie dough to make ahead and keep in the fridge or freezer (wrap air tight) until needed!
I recommend a minimum of 30 minute chill time, but of course you could make ahead and let chill overnight to bake the next day. Chilling a cookie allows the butter to firm up again, preventing it from leaking during the baking process. This gives the cookies their thickness and non-cake-like texture. The brown sugar and vanilla are crucial to deep flavours and the gorgeous texture. No need to press down before baking. Bake as balls, and squish just a little just before baking for that Instagram look.

TOP TIPS FOR THE BEST Milk Chocolate Chunk and Walnut Cookies
- Butter: Make sure to use melted butter. This really helps the texture.
- Sugars: The combination of light brown and granulated sugars really contributes to a chewy centre and perfect bake.
- Filling: I roughly chop a few bars of milk chocolate and some walnuts for a really textured cookie. Milk chocolate chips will work too. As will other nuts.
- Chill Time: I know everyone hates this part but it really helps make the best cookies! Go for 30 minutes minimum. If you are making ahead, overnight is great!
- Bake Time: Take the cookies out when they are just turning gold at the edges as they continue to bake even when removed from the oven due to residual heat. This means they retain a little of that fudgy/soft centre that is just perfect to bite into.
I bake these Milk Chocolate Chunk and Walnut Cookies on classic sheet pans (like these) and always opt for silicone baking mats (these are the ones I use) as they’re better for the planet! For more cookie recipes, check out these Hot Chocolate Churro Cookies or these Harry Potter Butterbeer Cookies. For more baking inspiration, head on over to my Instagram.

Milk Chocolate Chunk and Walnut Cookies
Ingredients
- 125 g Unsalted Butter Melted
- 120 g Light Brown Soft Sugar
- 100 g Granulated Sugar
- 1 Medium Free Range Egg
- 2 tsp Vanilla Extract
- 275 g Plain Flour
- 3 tsp Baking Powder
- 200 g Milk Chocolate Chopped
- 100 g Walnuts Chopped
Instructions
- In a large bowl, using an electric/stand mixer (or hand whisk, just double/triple the times) combine the butter and both sugars on medium speed for several minutes, until fully combined. Add the egg and vanilla and mix again.
- Add the flour, baking powder, chocolate and walnuts and fold until combined. The dough should be fairly solid at this stage (it ought to almost form a ball, albeit a very soft one!).
- Cover and chill in the fridge at least 30 minutes.
- Preheat the oven to 200C/180C Fan/Gas 6. Line 2-3 large baking trays. Roll into about 14 balls (use a tablespoon to scoop balls of dough). Place on lined baking sheets. Bake 10-12 minutes, until just golden at the edges. Let cool on a wire rack before eating!


what is the “definite” time to beat the sugar and butter? Thank you
I always say about 3-5 minutes because it can vary depending on temperature – but 3 minutes would realistically be enough!
Can I just say what a comfort to find somebody who truly understands what theyre talking about on the net. You certainly understand how to bring a problem to light and make it important. A lot more people really need to look at this and understand this side of the story. I cant believe youre not more popular because you definitely possess the gift.