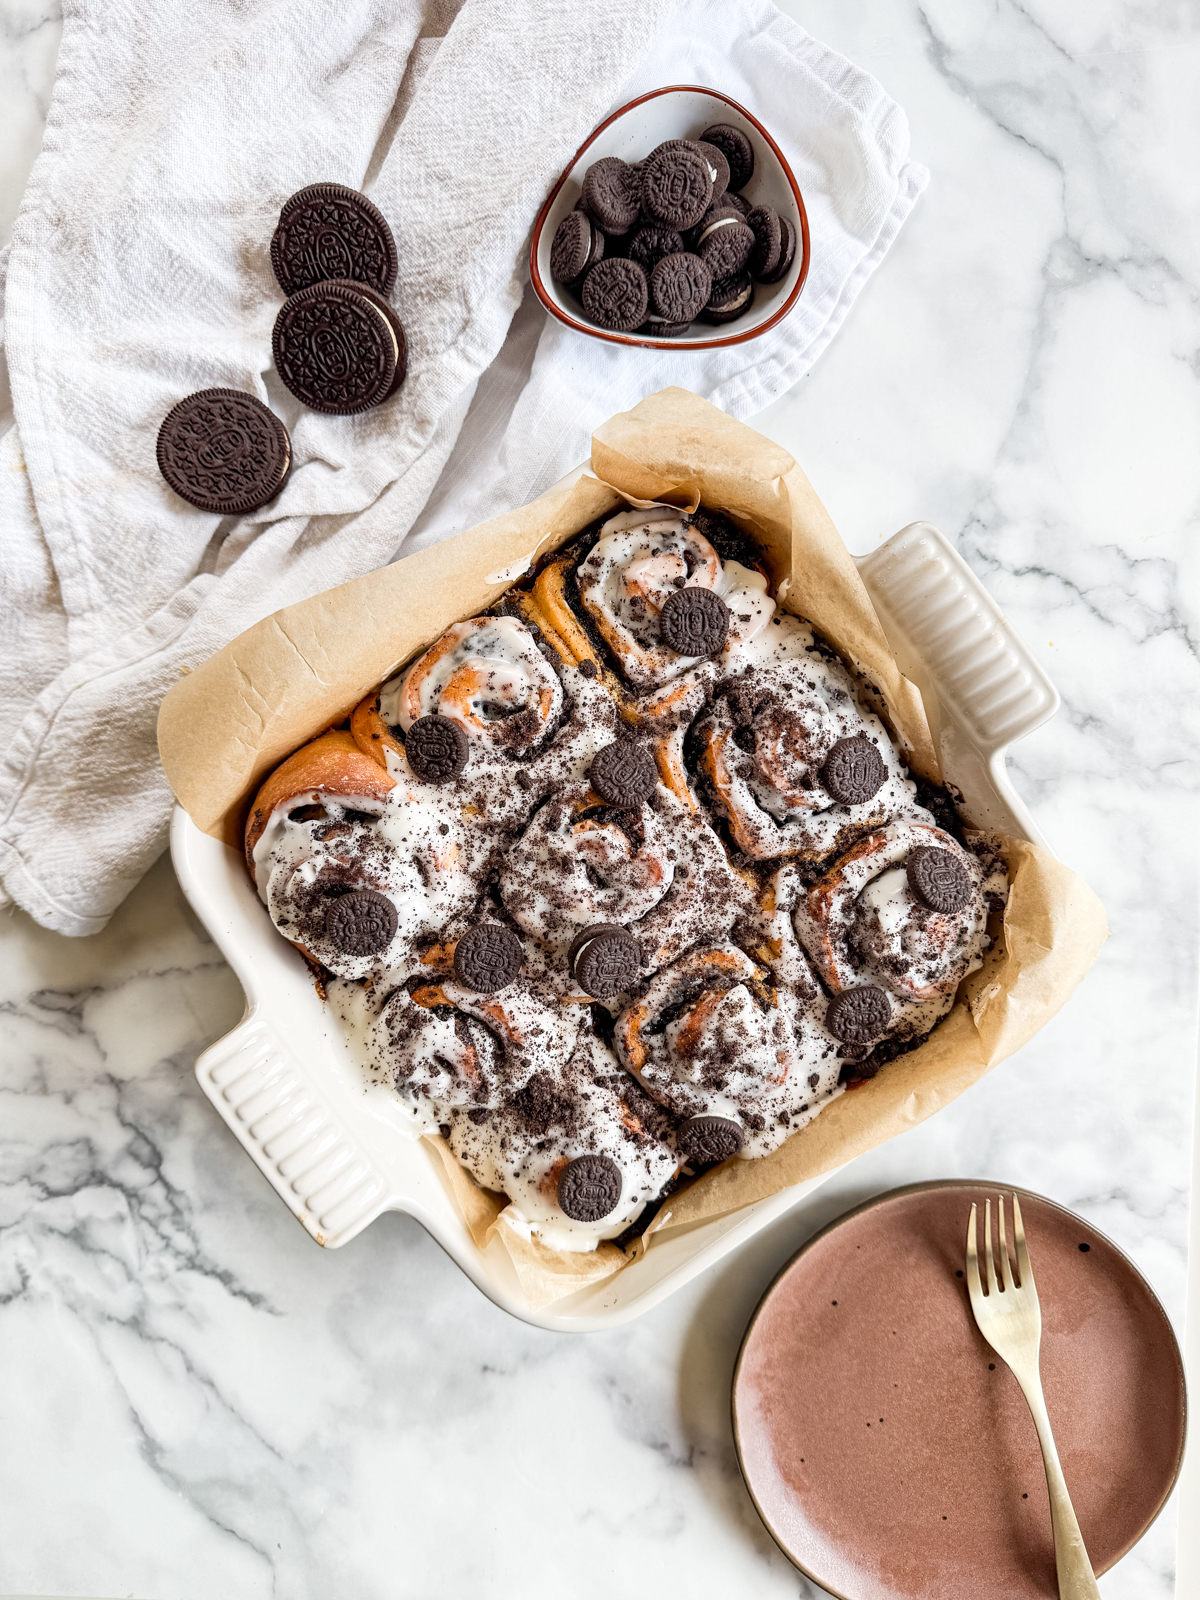
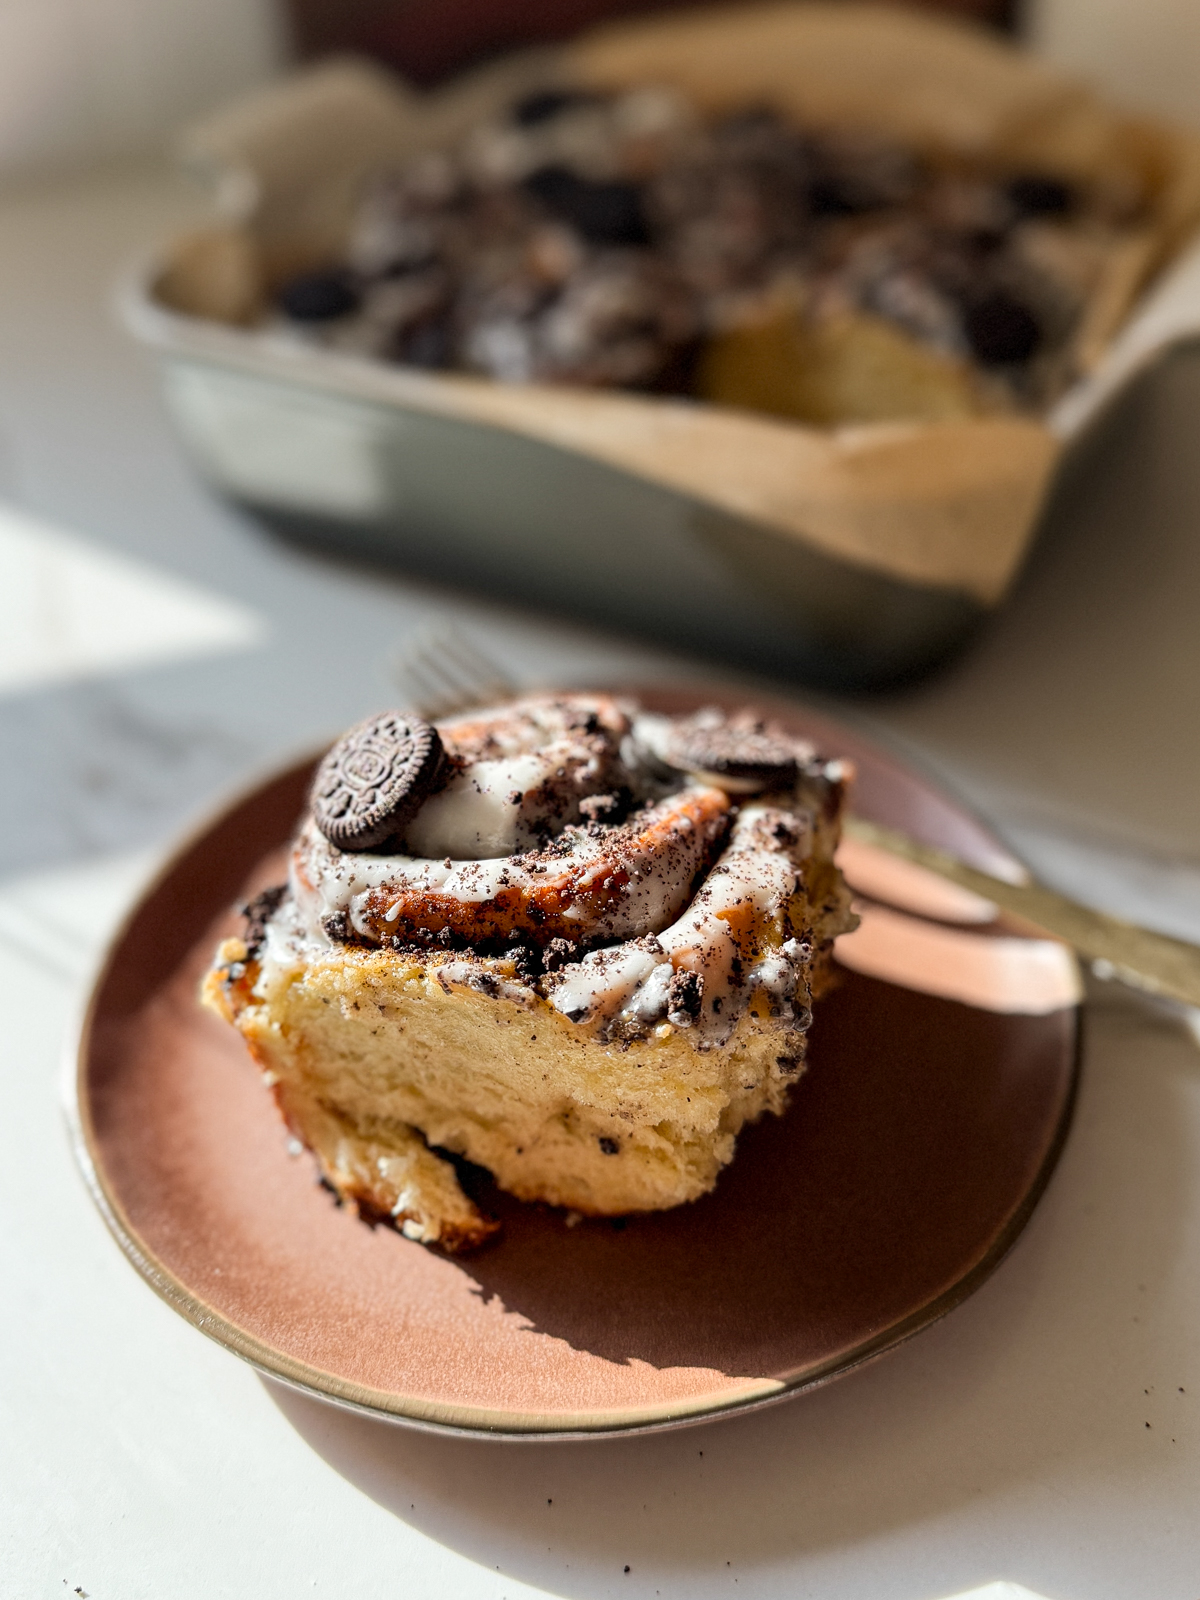
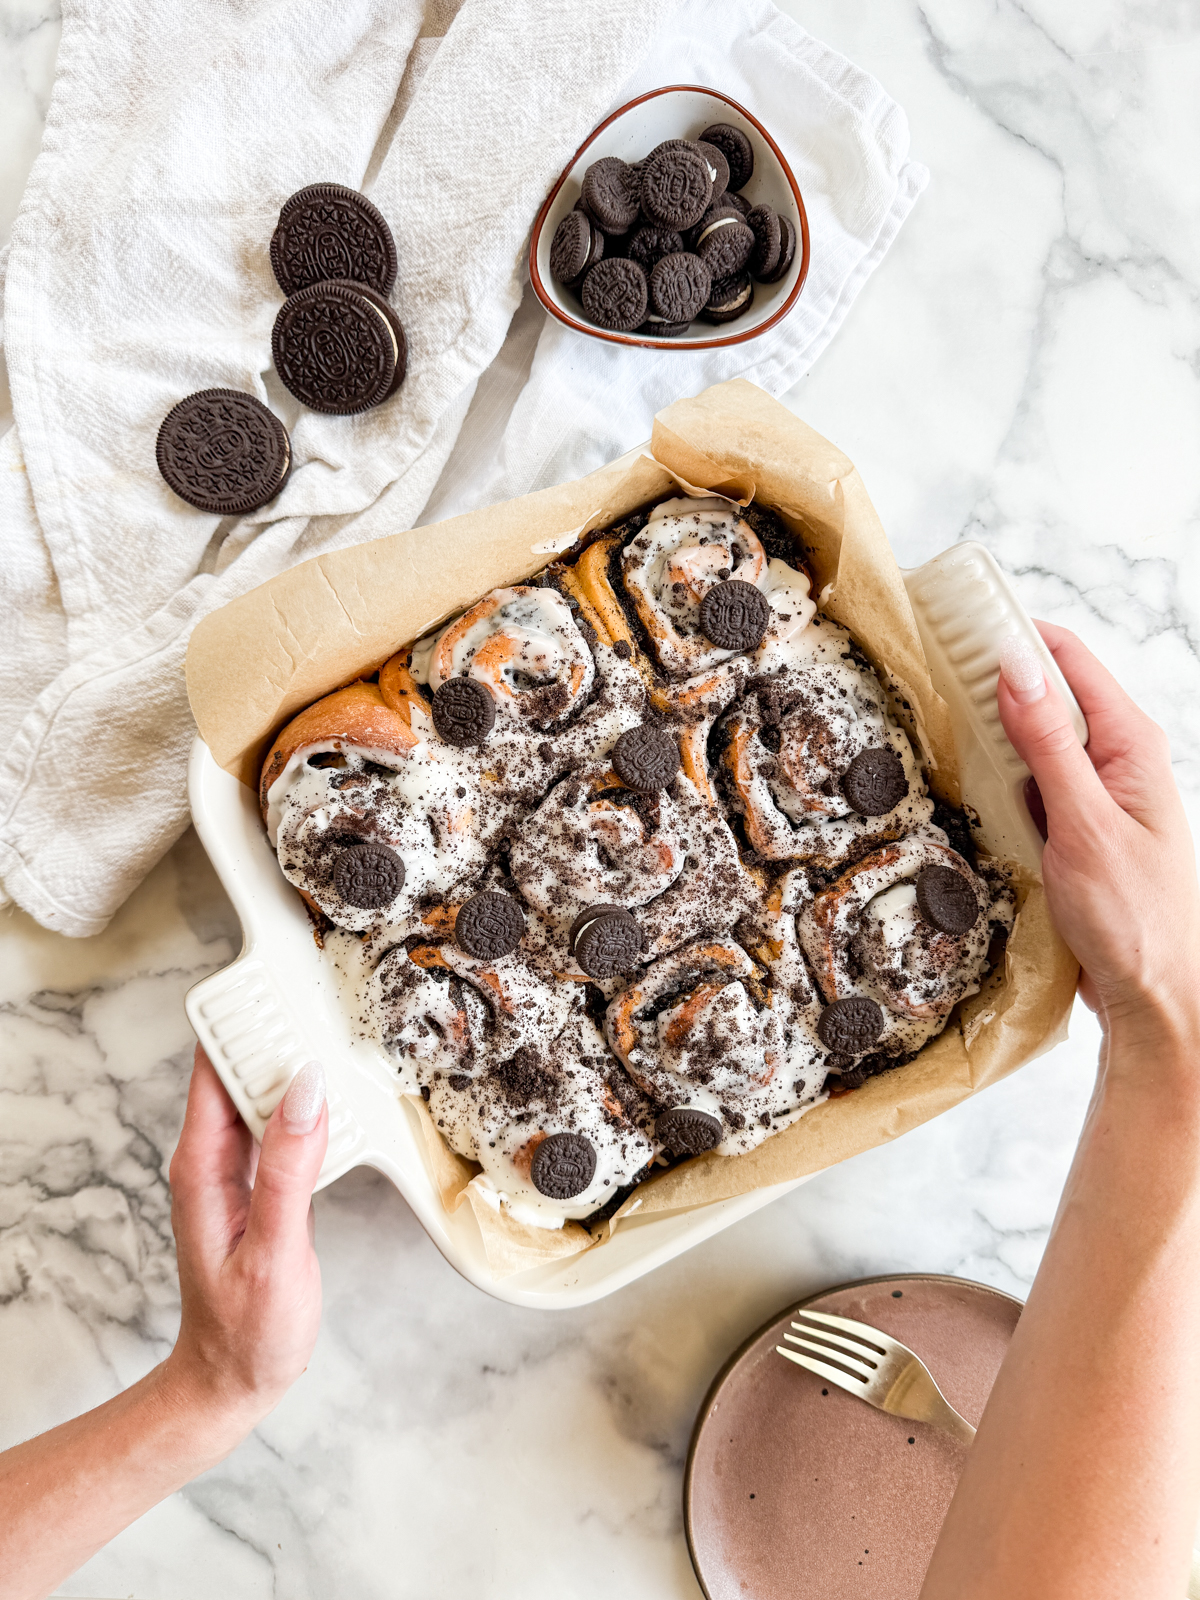
These Oreo Cinnamon Rolls are a fantastic spin on my favorite cinnamon roll recipe. The filling comprises of the classic cinnamon, sugar and butter but with the addition of Oreo crumbs. Bake, then cover in frosting and a good sprinkle of Oreo crumbs plus extra Oreos for decoration. These are fabulously fluffy with that Oreo hit throughout. As always with a cinnamon roll, these are definitely best eaten while warm!
Fluffy dough gets rolled around the classic cinnamon butter filling but with a little twist in the form of Oreo crumbs as part of the filling and sprinkled on top. These cinnamon rolls are a gorgeous treat for a birthday, to start your weekend, to serve to your partner/girl squad or simply to give yourself that self love you deserve! In this recipe, we fill the cinnamon roll dough with a good amount of the classic cinnamon butter filling plus LOTS of Oreos. I like to use the mini ones to decorate and whatever you have for the filling. This is also a great way to use up a sleeve of Oreo cookies that’s been open a little while – still okay to eat but have maybe lost the crunch. Once they go in the filling, it won’t matter!
These are a fabulous bake when you want to make something a little more exciting to a standard cinnamon roll! I find working with dough to be such a joy and the outcome always so rewarding. If you’re looking for a fun bake to make for a brunch, this is it! Fluffy bites of dough packed with cinnamon flavours and smothered in glaze: you’ll be the best host/parent/partner/friend ever.
TIPS FOR MAKING GREAT CINNAMON ROLLS
- Use Quality Ingredients
Start with fresh, high-quality ingredients. Use active dry yeast or instant yeast that hasn’t expired. For flour, all-purpose or bread flour can give you the best texture. Don’t skimp on the lemon curd either. - Proof Your Yeast
If using active dry yeast, make sure it’s alive and active by proofing it. Mix the yeast with warm water (around 110°F) and a pinch of sugar and wait for it to bubble. This will ensure that your rolls rise properly. - Opt for Full-Fat Dairy
Full-fat milk, butter, and eggs will add richness and tenderness to your dough. The fat content is crucial for the texture of the cinnamon rolls. - Don’t Rush the Dough
Allow the dough to rise in a warm, draft-free environment until it’s doubled in size. This might take about 1-2 hours depending on the temperature of your kitchen. Be patient – it’s worth the wait. - Roll the Dough Evenly
When rolling out the dough, aim for an even thickness to ensure uniform baking and spirals. Use a rolling pin and maybe a ruler to measure the thickness. - Get the Filling Right
Making the cinnamon filling is really easy. Spread in an even layer across the dough. The layer might look thin, but once rolled up it’s just right! Otherwise, it can all leak out when slicing. - Slice with Dental Floss or Serrated Knife
For clean cuts, use dental floss or a sharp serrated knife to slice the rolled dough. This prevents the rolls from being squashed and keeps their beautiful shape. - Don’t Overcrowd the Pan
Give your rolls enough space to expand. They should be close enough to support each other as they rise but not so close that they’re squeezed into each other. - Bake Until Golden Brown
Keep an eye on the rolls as they bake and remove them from the oven once they’re just golden. Overbaking can lead to dry rolls. - Let Them Cool Before Icing
Wait for the rolls to cool slightly before adding icing. If they’re too hot, the icing will melt and run off, whereas slightly cool rolls will allow the icing to set better on top.
INGREDIENTS REQUIRED
There are no specialist ingredients or equipment required for this bake. I can find everything I need at my local supermarket or grocery store. I use a deep 9″ square baking pan/casserole pan to bake these, lined with some greaseproof paper.
- Dried Fast Acting Yeast
- Whole Milk
- Granulated Sugar
- Unsalted Butter
- All Purpose Flour OR Strong White Bread Flour
- Large Eggs
- Heavy Cream (Optional)
- Ground Cinnamon
- Powdered Sugar
- Oreo Cookies (any combination of regular/mini)
TIPS FOR THE BEST Oreo Cinnamon Rolls
- Yeast: Check your yeast before continuing with the recipe. When you add it to the warm milk, it should ‘bloom’ – meaning it goes bubbly. If it doesn’t do this, it has probably expired and you’ll want to use a new pack!
- Warm Milk: Ensure it is warm to the touch but not hot – it should feel similar to skin temp. Otherwise, it could kill the yeast.
- Cinnamon Filling: Use room temperature butter so that it combines without too much effort. It will then spread over the dough with ease. When rolling, if it looks like the filling is falling out just scoop up some of the excess with a spoon before rolling further.
- Oreos for the filling: Use any Oreos, and crush using either a food processor/blender, or just put into a sandwich bag and smash with a rolling pin. No need to separate the cookies from the filling before smashing up! We keep things low effort around here.
- Cutting the dough: Once the dough is rolled into a log, use a sharp knife to cut into rolls. It’s a great idea to score where you intend to slice before fully cutting each piece. This means you know if your cinnamon rolls will be the same size.
- Heavy Cream: Pour over a little drizzle of cream prior to baking. This keeps them really moist and soft in the center.
- Overnight: If making overnight/needing longer between proofs, place the dough in the fridge otherwise it may ‘over prove’, losing the desired texture.
- Toppings/Decorating: After covering in the glaze, scatter over some crushed Oreos and add any extra Oreos – I like the mini ones!
STORAGE/MAKE AHEAD FOR MY Oreo Cinnamon Rolls
When it comes to storing fresh sweet rolls/bread, it’s essential to maintain their texture and flavor. Here are a few tips to help you store your Oreo Cinnamon Rolls correctly!
Store leftover cooled homemade cinnamon rolls in an airtight container for 3-5 days. Rewarm individually in the microwave on a plate for about 15-30 seconds or until soft and squishy. To Freeze: Once baked, the sweet rolls can be frozen for up to 3 months. Let thaw overnight in the refrigerator and warm in the microwave for a few seconds before serving!
To make ahead, you can replace either rise with an overnight rise in the refrigerator. Make sure to cover with cling film/saran wrap. The next day, continue with the recipe as laid out. No other changes are needed! Take care not to leave too long beyond overnight in the refrigerator. Although it slows rising, it doesn’t totally stop it, and you don’t want it to overflow from its container.
I bake these Oreo Cinnamon Rolls in a 9×9″ inch square baking dish, but anything similar sized will work! Try a 9 inch Dutch Casserole, pie dish or cake tin. To make the kneading easier, I tend to use the dough hook on my stand mixer. For more doughy recipes, check out these Tiramisu Cinnamon Rolls. For videos and baking inspiration, head on over to my Instagram. If you make this recipe, don’t forget to drop it a star rating, leave a review or share a photo on your socials!
Oreo Cinnamon Rolls
Ingredients
- 7 g (¼ oz) Packet Dried Fast Acting Yeast
- 200 ml (¾ cup) Warm Milk See Notes
- 50 g (¼ cup) Granulated Sugar
- 55 g (¼ cup) Unsalted Butter Melted
- 440 g (3 ½ cups) All Purpose Flour
- 1 (1) Large Egg
- 1 (1) Large Egg Yolk
- 50 ml (¼ cup) Heavy Cream Optional
For the Filling
- 113 g (½ cup) Unsalted Butter
- 110 g (½ cup) Light Brown Sugar
- 2 tsp (2 tbsp) Vanilla Extract
- 150 g (2 cups) Oreo Cookies Approx 20 regular sized Oreos
For the Glaze
- 200 g (1 ⅔ cups) Powdered Sugar
- 3 tbsp (1 tbsp) Milk
- Oreos/Crushed Oreos to decorate
Instructions
- Start by combining the yeast, warm milk and sugar in a large bowl or the bowl of a stand mixer. The milk should be just warm to the touch but not hot. Let bloom for 5 minutes – it should look 'bubbly'.
- To that bowl, add in one whole egg and egg yolk and the melted butter. Mix to combine. Add the flour and mix to form a dough.
- Knead for 8-10 minutes. Spray the bowl with some oil and let rise in a warm place for about an hour (until doubled in size).
- Line a 9×9" square dish with baking parchment.
For the Filling/Assembly
- Make the filling by combining the butter, vanilla and sugar in a bowl to form a paste. Set aside. Crush the Oreos either in a food processor/blender, or place them in a sandwich bag and bash with a rolling pin. No need to separate the filling from the cookie.
- Once the dough has doubled in size, tip onto lightly floured surface. Use a rolling pin to roll to about 15×8 inches. Spread the cinnamon filling over the dough in an even layer. Scatter over the crushed Oreos.
- Starting with the long side, roll the dough away from you to form a tight log. Use a sharp knife to cut about 9 rolls. Place into the lined dish. Let rest 30 minutes.
- Preheat the oven to 360℉/175℃. If using, pour over the cream then bake the tray of sweet rolls for about 18-20 minutes: until a light golden color. Remove and let cool.
- Make the frosting by combining powdered sugar and milk to form a thick but spreadable consistency. Spread over the rolls once they've cooled. Scatter over any extra crushed Oreos or mini Oreo cookies to decorate!