These Marbled Funfetti Shortbread Cookies are a super fun switch up to a classic shortbread cookie. The marbling is really fun to do, and the result is a crumbly, buttery cookie that looks gorgeous! These are great for parties or as a small gift. Change up the colors and sprinkles to fit the theme or your preference.
This is a super simple cookie recipe in itself, just needing a little chill time to firm the dough. This is what allows the cookies to keep shape and texture. I recommend a minimum of 30 minute chill time, but of course you could make ahead and let chill overnight to bake the next day. I know even I dislike finding a recipe to see I need to let something hand out in the fridge. However, chilling a cookie allows the butter to firm up again, preventing it from leaking during the baking process. This gives the cookies their thickness and non-cake-like texture. It also helps to slice them neatly.
Tips for Great Shortbread
Shortbread is a classic Scottish treat that has won the hearts of people all around the world. Its beauty lies in its simplicity, typically made from nothing more than butter, flour, and sugar. We change it up and add an egg to help the structure hold together. However, the key to perfect shortbread is in the details. Follow these tips to ensure your shortbread is the best it can be!
1. Quality Ingredients Matter
- Use the best quality butter you can find. Since butter is the key flavor in shortbread, opt for high-quality, unsalted butter.
- Choose fine sugar, either caster or granulated, for a more delicate texture
2. Keep Everything Cool
- Make sure your butter is cold to start; this helps to create a tender, flaky texture.
- Chill your dough before baking, so the cookies maintain their shape and do not spread too much.
3. Don’t Overwork the Dough
- Mix until the ingredients are just combined. Overworking the dough can activate the gluten in the flour, leading to a tough shortbread.
4. The Right Temperature
- Bake at a low temperature. Shortbread should be cooked gently, so it dries out to its characteristically crunchy texture without browning too quickly.
- Remember, shortbread continues to cook as it cools, so it might still be soft when first removed from the oven.
5. Storage
- Store your shortbread in an airtight container to keep it crisp. It can also last a long time, making it perfect for gifts.
6. Add Your Touch
- Don’t be afraid to add your own twist! Change the color and sprinkles to suit a theme or your preference! Orange for Halloween, green/red for Christmas, pink for Valentine’s Day etc.
By paying attention to these details, you can achieve a deliciously buttery and crisp shortbread that’s both traditional and tailored to your tastes. Happy baking!

TOP TIPS FOR THE BEST Marbled Funfetti Shortbread Cookies
- Butter: Room temperature, unsalted butter is best!
- Sugars: Stick to white granulated or caster sugar. Anything else will change the texture/structure.
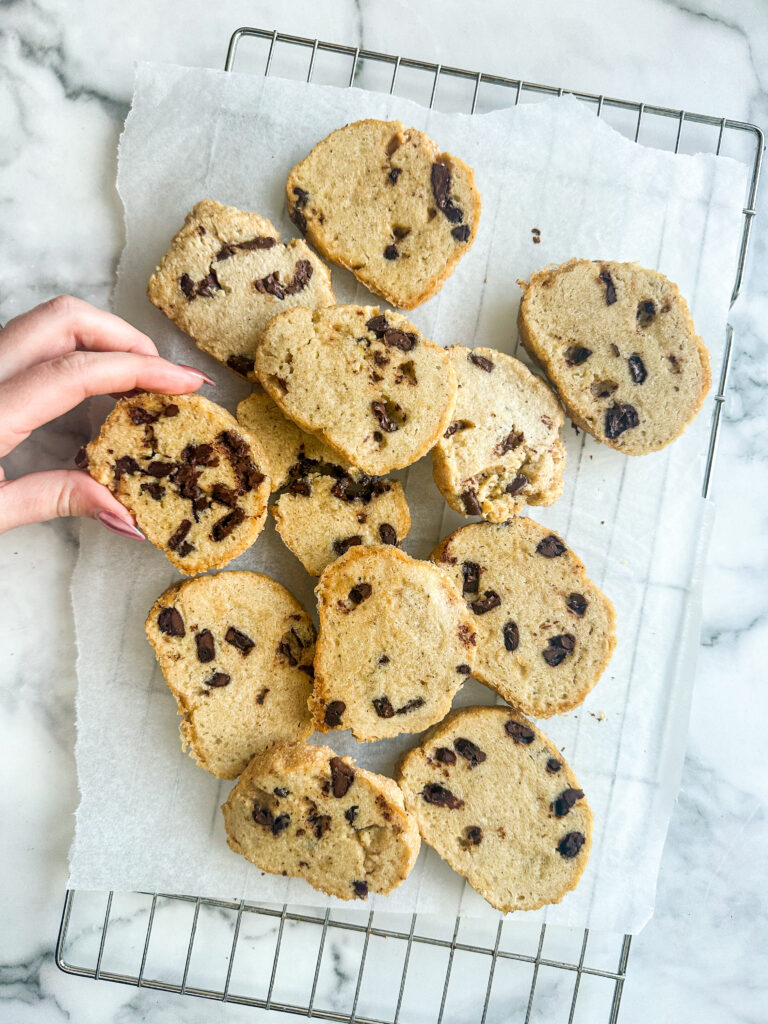
- Marbling: Follow the instructions, or my Instagram reel video to get an idea of how to do this. Essentially you half the dough and color one of the halves. Roll the colored dough into 4 long logs. Wrap the colored logs with plain dough. Place the logs together and roll together. Slice into two. Place one on top of the other. Roll and slice in half again. Repeat to form a log about 6-7 inches. Then, roll the dough in the sprinkles, wrap in plastic wrap and chill.
- Assembly: After chilling, these will slice really neatly. Use a sharp knife to cut 1/2 inch rounds and place them straight on a baking sheet.
- Chill Time: This really does help to make the best cookies! 30 minutes is the minimum to let the dough form up, meaning the butter doesn’t ‘leak’ whilst baking. If you are making ahead, overnight is great!
- Bake Time: Take the cookies out when they are just turning gold at the edges as they continue to bake even when removed from the oven due to residual heat. They may look pale, but shortbread shouldn’t go brown the way a classic cookie does.
- Funfetti: Use any type of sprinkles you like. Feel free to change the color of the marbling to suit the occasion!
A few notes for these Marbled Funfetti Shortbread Cookies. In the recipe, I call for 2 large baking trays to bake the cookies. I recommend baking in one go, rather than separate batches, to prevent the butter from warming up before going in the oven. I like large sheet pans (like these) and always use silicone baking sheets (I like these ones) as it’s better for the planet!
For more cookie ideas, check out my Chai Latte Frosted Cookies. For more baking inspiration and videos, head on over to my Instagram.

Marbled Funfetti Shortbread Cookies
Ingredients
- 100 g Unsalted Butter Room Temperature
- 50 g Granulated Sugar
- 175 g AP/Plain Flour
- 1 Large Free Range Egg
- Gel Food Color
- Funfetti/Sprinkles
Instructions
- In a large bowl, beat the butter for several minutes to soften – best done with a stand/electric mixer. Add the sugar and continue to beat until fully incorporated. Add the egg and mix again.
- Finally add the flour and beat again until it comes together. You’ll know it’s done when you it will hold together when you press it with your hands – a solid dough.
- Remove half the dough and place in a bowl. Set aside. In the bowl with the mixer, add some drops of food color (I use pink, and the gel food color), and mix.
- Take the colored dough, divide into four and shape each into a log about 7/8 inches long. Wrap the plain dough around each colored log. Do this by dividing the plain dough into four pieces, roll into a tube then flatten, then shape these flattened dough pieces around the colored tubes. NOTE: See video for clearer steps.
- Place two 'wrapped' logs side by side, touching, then two on top. Roll together into a long log. Cut in half. Place one log on top of the other, and roll out again. Slice in half, repeat (you can repeat once or 2-3 more times, each time 'thins out' the lines and will cause some merge of the colors). Shape into a log about 6-8 inches long.
- On a tray/large plate, pour out all your sprinkles. Place the log on top and roll in the sprinkles to cover. Wrap this sprinkle covered log of dough in plastic wrap and chill in the fridge at least 30 mins.
- Pre-heat the oven to 350f/180c. Line two large baking trays.
- Remove the dough from the fridge. Slice rounds about 1/2 inch thick. Place onto the lined sheets (they don't need to be too far apart as they won't spread, but leave a little space).
- Bake 15-20 minutes. They won't look golden the way a regular cookie looked, but will continue to cook when removed. Let cool before serving!