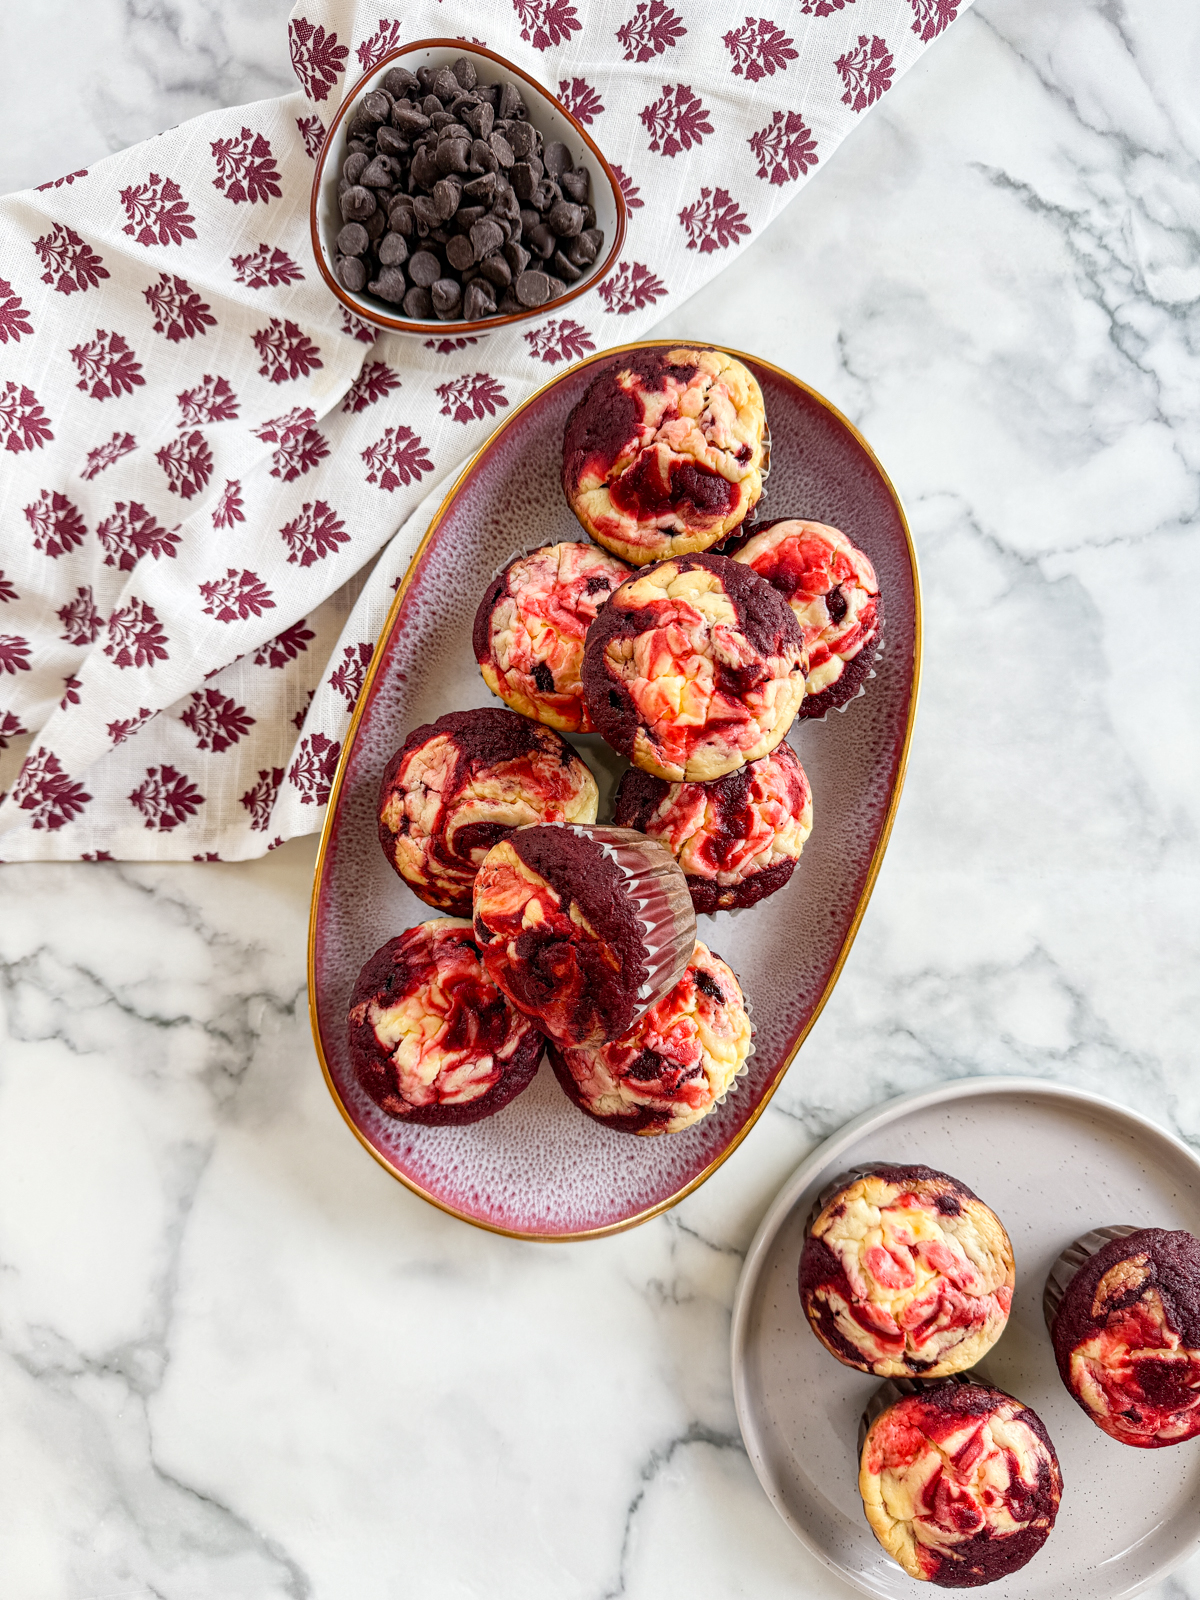
Red Velvet Cheesecake Brownie Cups ❤️🧁
If you love brownies, cheesecake, and red velvet cake, these Red Velvet Cheesecake Brownie Cups are SURE to become your new fav dessert. They are super beginner friendly, and use red velvet cake mix to save stress. The brownie base gets topped with a cheesecake mix then swirled with red velvet cake mix for a lil combination of 3 truly wonderful things!
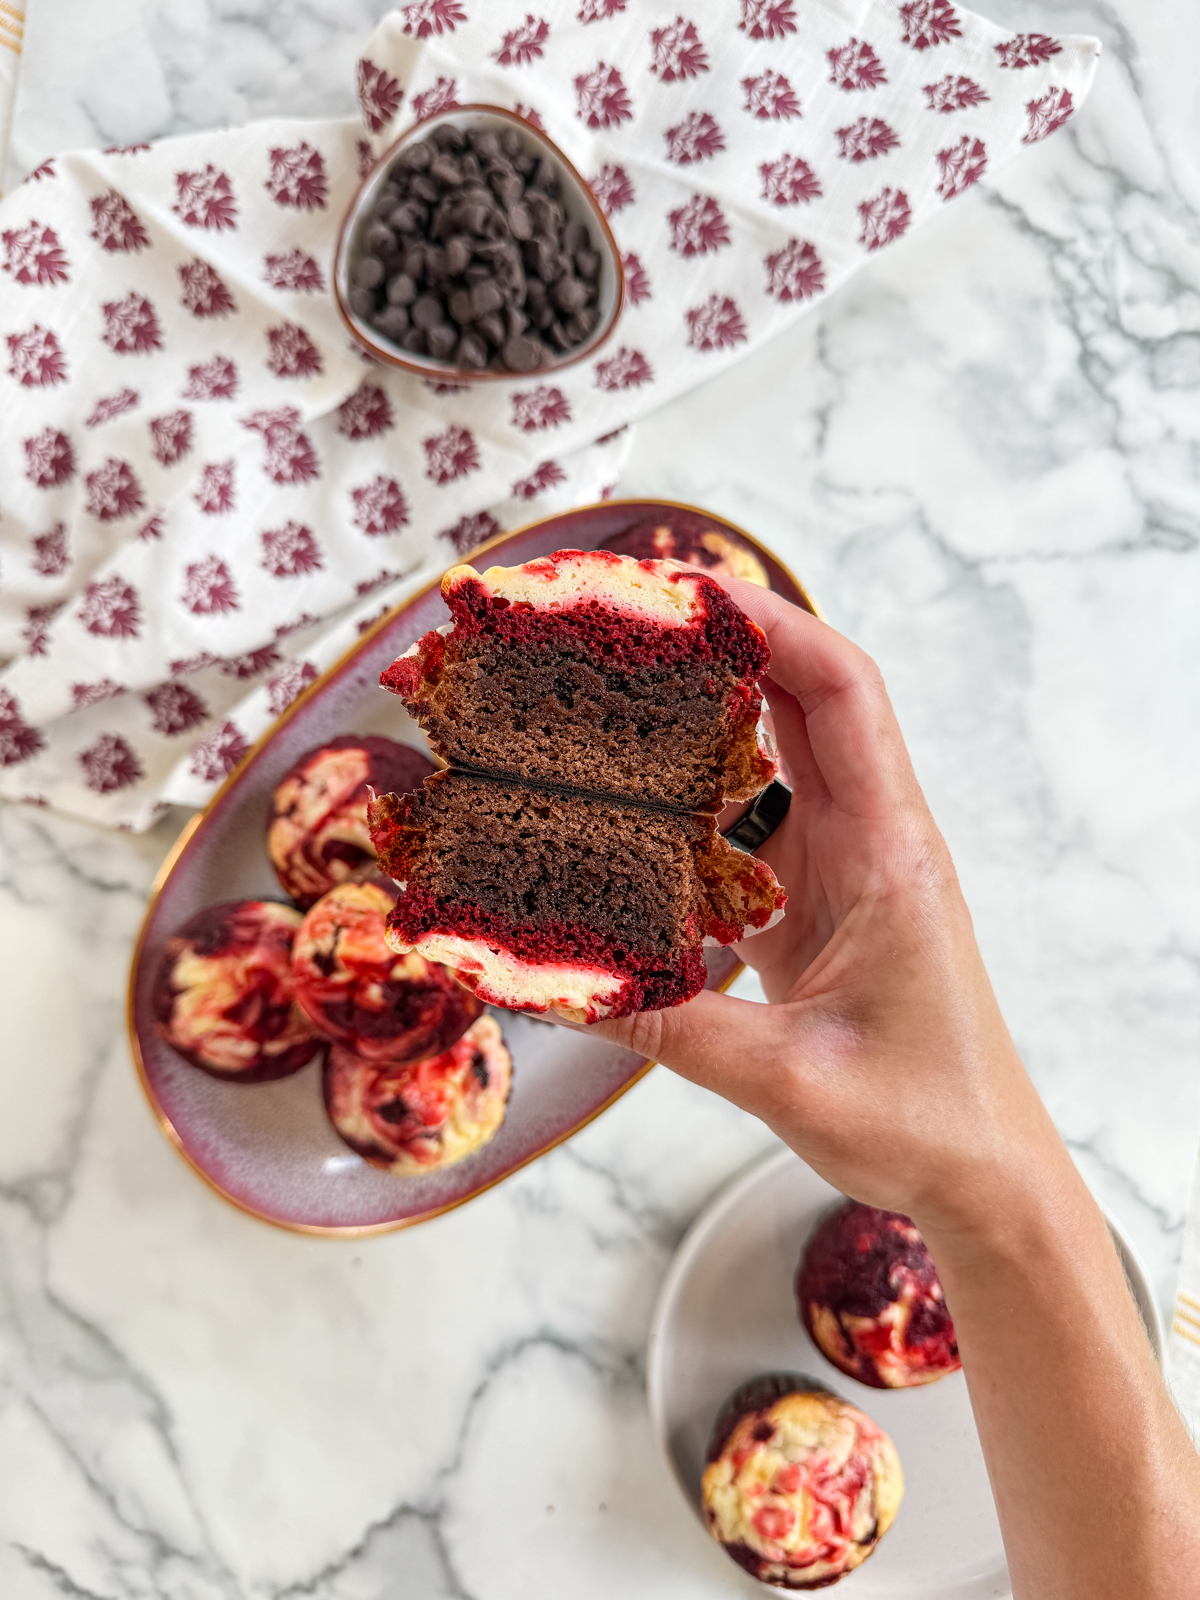
Each cup starts with a fudgy brownie base, topped with a creamy cheesecake layer, and finished with a soft red velvet cake topping. The contrast of textures and flavors makes these feel bakery quality, yet they are made with simple ingredients and easy steps. After baking, there are no further steps – you just have to bake, let cool and eat!
These brownie cups are perfect for holidays, parties, bake sales, or anytime you want a dessert that feels a little extra without being complicated.
Why You Will Love These Brownie Cups 💕
- Beginner friendly with clear, simple steps
- No slicing required thanks to muffin pan portions
- Three distinct layers with amazing texture
- Festive red velvet color makes them perfect for celebrations
- Easy to make ahead and store
If layered desserts feel intimidating, this recipe is a great place to start.
What Are Red Velvet Cheesecake Brownie Cups 🍰🍫
These are individual sized desserts baked in a muffin tin instead of a pan.
The bottom layer is a rich chocolate brownie that bakes up soft and fudgy. On top of that is a smooth cheesecake layer made with cream cheese and vanilla. The final layer is a light red velvet cake batter spooned over the cheesecake before baking.
As they bake, the layers set beautifully, giving you a brownie cup with a firm base, creamy center, and soft cake topping. They look stunning once cooled and are easy to decorate with frosting, crumbs, or a dusting of powdered sugar if you like.
Ingredients You Will Need 🧁
Brownie Base
- Unsalted butter
- Granulated sugar
- Light Brown Sugar
- Semi-Sweet Chocolate
- Egg
- Vanilla extract
- Cocoa powder
- All purpose flour
Cheesecake Layer
- Full fat cream cheese, softened
- Granulated sugar
- Egg
- Vanilla extract
Red Velvet Cake Layer
- Red Velvet Cake Mix
- Water
- Eggs
- Vegetable Oil
Beginner tip: Always use room temperature cream cheese for the cheesecake layer. Cold cream cheese causes lumps that are hard to fix.
How to Make Red Velvet Cheesecake Brownie Cups 👩🍳✨
Step 1: Prepare the Muffin Pan
Line a standard muffin pan with paper liners. Lightly spray the liners if they are thin to prevent sticking.
Preheat your oven before mixing. Proper oven temperature helps all three layers bake evenly.
Step 2: Make the Brownie Batter
Melt the butter and whisk it with sugar until glossy. Add the egg and vanilla, mixing until smooth. Stir in cocoa powder, flour, and salt just until combined.
Divide the brownie batter evenly between the muffin liners, using about one to two tablespoons per cup. Gently spread it to cover the bottom.
Step 3: Make the Cheesecake Layer
Beat softened cream cheese until smooth and creamy. Add sugar and mix well, then beat in the egg and vanilla.
Spoon a layer of cheesecake batter over the brownie base in each liner. Do not overfill. The layers will rise slightly as they bake.
Step 4: Make the Red Velvet Batter ❤️
In a clean bowl, mix butter or oil with sugar until combined. Add the egg and vanilla. Stir in cocoa powder and red food coloring until evenly colored.
Add flour, baking powder, salt, and milk, mixing just until smooth. The batter should be pourable but not runny.
Step 5: Assemble the Cups
Spoon red velvet batter gently over the cheesecake layer in each muffin cup. Fill until about three quarters full to prevent overflow.
Tap the pan lightly on the counter to settle the layers.
Step 6: Bake and Cool
Bake until the tops are set and a toothpick inserted into the red velvet layer comes out mostly clean.
Allow the brownie cups to cool completely in the pan. Then refrigerate for at least one hour before serving. Chilling helps the cheesecake layer fully set and improves flavor.
Troubleshooting and Common Mistakes 🚨
Layered muffin desserts can be tricky at first. Here is how to avoid common issues.
My brownie base is dry
This usually means the brownie layer was overbaked or too thin. Make sure to use enough batter in each cup and remove the pan as soon as the tops are set.
The cheesecake layer sank
This can happen if the cheesecake batter is overmixed or too warm. Mix just until smooth and make sure the brownie layer is evenly spread.
My red velvet color looks dull
Red velvet needs enough food coloring to show through the cocoa. Gel food coloring gives the best vibrant color without thinning the batter.
The layers blended together
Spoon each layer gently and avoid swirling. Keeping layers separate gives the best visual result.
My cups stick to the liners
Let them chill fully before peeling. Cheesecake based desserts release much more cleanly when cold.
WHEN IT COMES TO MAKING THE BEST BROWNIES, HERE ARE A FEW TIPS TO KEEP IN MIND:
- Quality Ingredients: Always use high-quality ingredients in your brownie recipe. This includes using good quality chocolate, cocoa powder, and fresh eggs. It will make a noticeable difference in the taste and texture of the brownies.
- Don’t Overmix: When combining the ingredients, be gentle and avoid overmixing the batter. Overmixing can lead to a denser and tougher texture. Mix until the ingredients are just combined.
- Proper Pan Size: Use the recommended pan size mentioned in the recipe. Using a smaller or larger pan can affect the baking time and the texture of the brownies. For this brownie recipe, we use a standard muffin tin with regular muffin liners.
- Do Not Overbake: Keep a close eye on the brownies while they are baking and avoid overbaking them. A slightly underbaked brownie will be fudgy and moist, while an overbaked one can turn out dry. Insert a toothpick into the center – if it comes out with a few moist crumbs, the brownies are done.
- Let Them Cool: Allow the brownies to cool completely in the pan before cutting and serving. This helps them to set and ensures that they hold their shape. It also allows the flavors to develop fully.
- Experiment with Additions: Feel free to get creative with your brownie recipe by changing up the chocolate chips/chocolate chunks, or by adding nuts or fruit. Just make sure not to overload the batter, as it may affect the texture.
Decorating Ideas ✨
These brownie cups are beautiful on their own, but you can dress them up easily.
- Pipe a swirl of cream cheese frosting on top
- Sprinkle with red velvet crumbs
- Dust lightly with powdered sugar
- Add white chocolate curls or sprinkles
For holidays like Valentine’s Day or Christmas, a simple frosting swirl makes them extra festive.
Storage and Make Ahead Tips ❄️
These brownie cups store very well.
- Store in an airtight container in the refrigerator for up to 5 days
- Freeze without frosting for up to 2 months
- Thaw overnight in the fridge before serving
They are a great make ahead dessert for parties since the flavor improves after chilling.
Perfect Occasions to Serve These 🎉
- Valentine’s Day
- Christmas dessert tables
- Baby showers and bridal showers
- Bake sales
- Anytime you want an elegant individual dessert
Because they are individually portioned, they are easy to serve and transport.
Final Thoughts: Red Velvet Cheesecake Brownie Cups 💭
These Red Velvet Cheesecake Brownie Cups combine three classic desserts into one stunning, beginner friendly treat. Baking them in a muffin pan makes them approachable, mess free, and perfect for sharing.
If you are new to baking layered desserts, take it step by step and do not rush the cooling time. The result is a rich, creamy, and festive dessert that looks impressive without requiring advanced skills.
Once you make these, they are sure to become a repeat recipe for special occasions and celebrations.
Happy baking ❤️
For my Red Velvet Cheesecake Brownie Cups, I use a basic 12 hole muffin tin. I also recommend a good stand mixer or high speed mixer (like this one) to make the brownie mixture. If you want more wild brownie recipe ideas, check out my Nutella Buttercream Brownie Cups. For videos and baking inspiration, head on over to my Instagram. If you make this recipe, don’t forget to drop it a star rating, leave a review or share a photo on your socials!
Red Velvet Cheesecake Brownie Cups
Ingredients
- 100 g (½ cups) Semi Sweet Chocolate Melted
- 170 g (¾ cups) Unsalted Butter Melted
- 100 g (½ cups) Granulated Sugar
- 100 g (½ cups) Light Brown Soft Sugar
- 2 (2) Large Eggs
- 2 tsp (2 tsp) Vanilla Extract
- 80 g (⅔ cups) All Purpose Flour
- 30 g (6 tbsp) Cocoa Powder
For the Cheesecake Topping
- 225 g (8 oz) Full Fat Cream Cheese
- 1 (1) Large Egg
- 50 g (¼ cups) Granulated Sugar
For the Red Velvet Cake
- 144 g (⅔ cups) Red Velvet Cake Mix Use 1/3 of a 15.25oz box
- 80 ml (⅓ cup) Water
- 1 Large Egg
- 40 ml (3 tbsp) Vegetable Oil
Instructions
For the Brownies
- Pre-heat your oven to 370℉/180℃. Line 12 muffin holes with cupcake/muffin liners.
- In a small bowl, break up the dark chocolate and melt in the microwave in 20 second intervals, stirring in between to make sure it doesn't burn. Alternatively, set up a double boiler. Do this by placing a heatproof bowl over a small pot of simmering water. Add the chocolate to the heatproof bowl and stir until melted.
- In a large mixing bowl, whisk together melted butter and both sugars. With an electric/stand mixer, combine for 3-5 minutes. Add in the eggs, one at a time, mixing in between.
- Add the melted chocolate slowly and combine once again.
- Add the flour and cocoa powder – fold gently into the wet mixture with a rubber spatula or wooden spoon until just combined.
- Scoop a generous tablespoon of batter into each muffin cup.
Make the Cheesecake Topping
- In a bowl, whisk together the cream cheese, sugar and egg until smooth. Spoon this cheesecake mixture over each brownie cup – about 1 tablespoon on each.
Make the Red Velvet Cake
- Combine the cake mix, water, egg and oil until combined and no lumps remain. For the remaining cake mix, seal the package/place into an airtight container for later use.
- Add a tablespoon or so of the red velvet mix onto each brownie cup. Swirl with a knife.
- Bake 22-24 minutes, until golden on top and no longer wobbly. Remove and let cool before eating!
Notes
- If your cream cheese is really cold, you may find the mixture becomes a little lumpy. To avoid this, heat the cream cheese up super carefully (either set it on top of the already pre-heating oven or – making sure to remove ALL foil – place in microwave for 20 seconds or so).
- I find the “whipped” or spreadable cream cheese to be the easiest to work with.